Renderer
This example demonstrates two distinct approaches for implementing custom rendering in Stride, allowing developers to extend the default rendering pipeline with their own 2D visualization code:
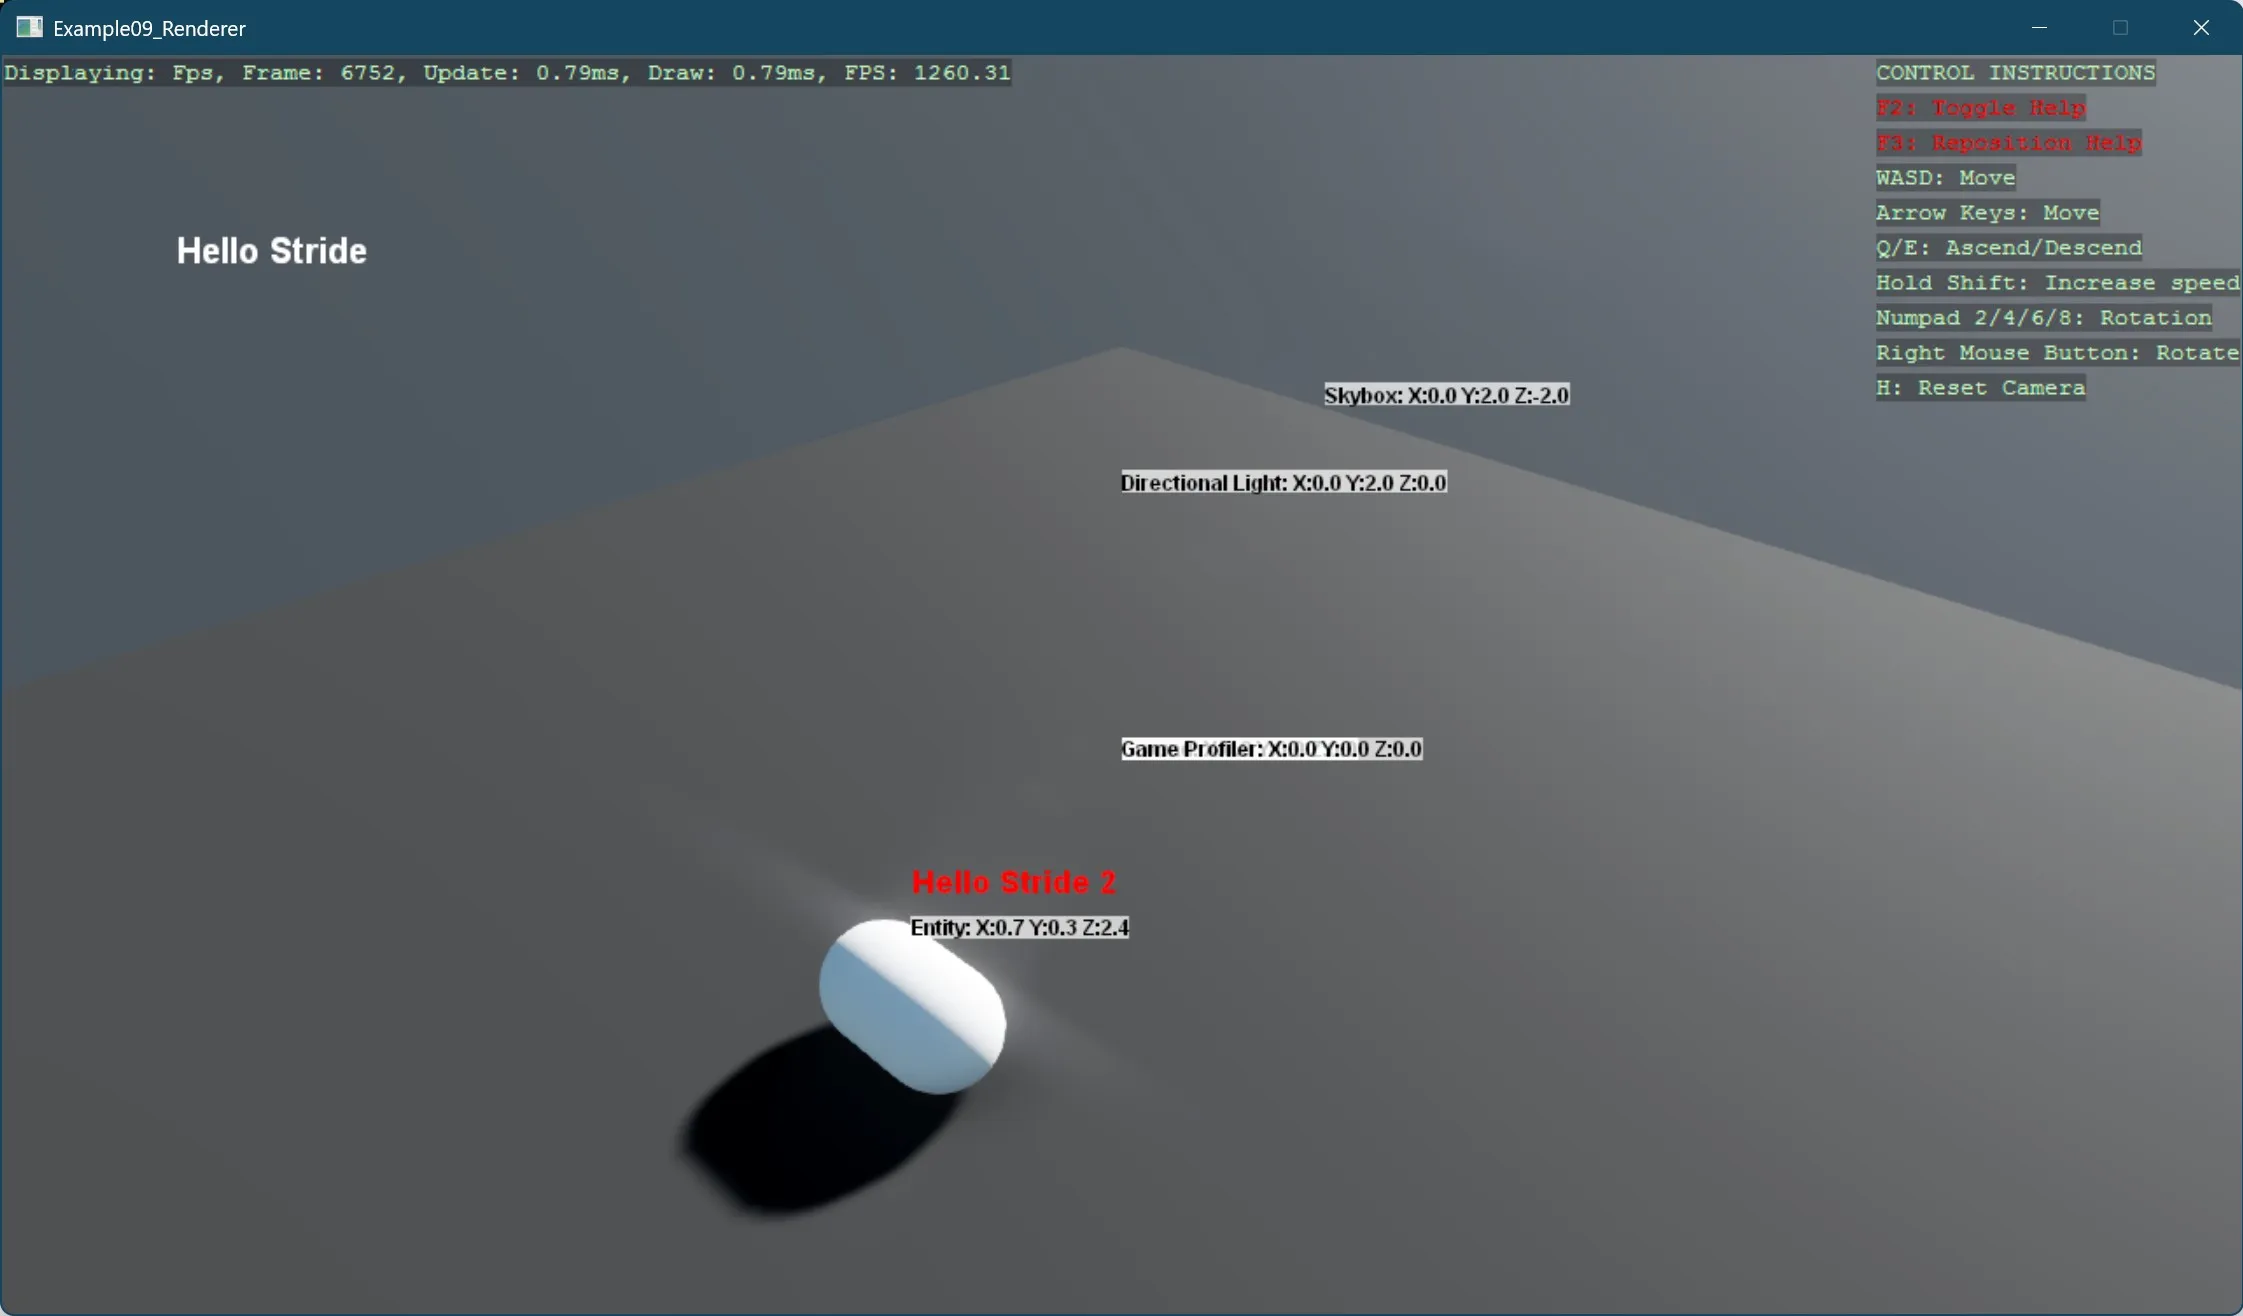
- Global Scene Renderer Implementation -
MyCustomSceneRenderer:- Creates a custom renderer that operates on all entities in the scene
- Implements SceneRendererBase to hook into Stride's rendering pipeline
- Renders both static text ("Hello Stride") and dynamic per-entity information
- Displays entity names and positions with semi-transparent backgrounds
- Converts 3D world positions to 2D screen coordinates for text placement
- Entity-Specific Renderer Implementation -
SpriteBatchRendererScript:- Attaches a custom renderer to a specific entity via a StartupScript
- Creates a DelegateSceneRenderer to handle rendering without subclassing
- Displays "Hello Stride 2" text specifically for its parent entity
- Demonstrates renderer initialization and integration through the component system
The example also includes physics interactions, applying an impulse to make the capsule roll after falling, showcasing how rendering can visualize dynamic object behavior. The combination of these approaches illustrates different architectural patterns for extending Stride's rendering capabilities:
- The scene-wide approach for global visualization needs (debug overlays, HUD elements)
- The entity-specific approach for object-focused rendering (labels, status indicators)
Both techniques utilize SpriteBatch for efficient 2D rendering within a 3D scene context, showing how to properly initialize resources, convert between coordinate systems, and integrate with Stride's render stages.
Note
This example requires the additional NuGet packages Stride.CommunityToolkit.Bepu, Stride.CommunityToolkit.Skyboxes and Stride.CommunityToolkit.Windows. Make sure to install all before running the code.
View on GitHub.
using Example09_Renderer;
using Stride.BepuPhysics;
using Stride.CommunityToolkit.Bepu;
using Stride.CommunityToolkit.Engine;
using Stride.CommunityToolkit.Renderers;
using Stride.CommunityToolkit.Rendering.Compositing;
using Stride.CommunityToolkit.Rendering.ProceduralModels;
using Stride.CommunityToolkit.Skyboxes;
using Stride.Core.Mathematics;
using Stride.Engine;
using Stride.Games;

// This example demonstrates three different ways of adding custom rendering logic to a Stride game.
// 1. Using a custom SceneRenderer via MyCustomSceneRenderer, which renders text for all entities and static text.
// 2. Using a custom EntityTextComponent, which is a component that can be added to any entity to render text.
// 3. Using a StartupScript via SpriteBatchRendererScript, which draws specific text for a single entity.
// All approaches integrate into the Stride rendering pipeline, demonstrating how to extend the default rendering behaviour.

BodyComponent? body = null;
bool impulseApplied = false;

using var game = new Game();

/// <summary>
/// Entry point for the game setup. The game runs with two main customizations:
/// 1. A custom scene renderer is added to display entity debug information using SpriteBatch.
/// 2. A custom script is added to an entity for specific entity-related rendering (e.g., "Hello Stride").
/// </summary>
game.Run(start: Start, update: Update);

void Start(Scene scene)
{
    // Sets up the base 3D scene, including lighting, camera, and default settings
    game.SetupBase3DScene();

    // Adds the built-in profiler, which provides real-time performance metrics
    game.AddProfiler();

    // Adds a skybox (a background environment) to the scene
    game.AddSkybox();

    // Example 1: Adds a custom scene renderer to render text for all entities in the scene and also "Hello Stride" text
    game.AddSceneRenderer(new MyCustomSceneRenderer());

    // Example 2: Adds a custom scene renderer to render text for all entities with a component of type EntityTextComponent
    game.AddSceneRenderer(new EntityTextRenderer());

    // Creates a 3D primitive (a cube) and sets its position in the scene
    var cube = game.Create3DPrimitive(PrimitiveModelType.Cube);
    cube.Transform.Position = new Vector3(0, 0.5f, 0);

    // Example 2: Adds an EntityTextComponent to the cube entity, which renders text
    cube.Add(new EntityTextComponent()
    {
        Text = "Example2: Me, Cube",
        FontSize = 12,
        TextColor = Color.Purple,
    });

    cube.Scene = scene;

    // Creates a 3D primitive (a capsule) and sets its position in the scene
    var capsule = game.Create3DPrimitive(PrimitiveModelType.Capsule);
    capsule.Transform.Position = new Vector3(0, 8, 0);

    // Lets tilt the capsule a bit which should cause it to move after it falls
    capsule.Transform.Rotation = Quaternion.RotationZ(MathUtil.DegreesToRadians(2));

    // Get the body component
    body = capsule.Get<BodyComponent>();

    // Example 3: Adds a custom startup script to the entity, which draws specific text using SpriteBatch when the game is running.
    capsule.Add(new SpriteBatchRendererScript());

    var textComponent = new EntityTextComponent()
    {
        Text = "Example2: Hello, Stride!",
        FontSize = 13,
        TextColor = Color.Blue,
        Offset = new(0, -100),
        EnableBackground = true,
    };
    capsule.Add(textComponent);

    // Assigns the entity to the root scene to ensure it is rendered and updated.
    capsule.Scene = scene;
}

void Update(Scene scene, GameTime time)
{
    if (body is null) return;

    if (impulseApplied) return;

    // Let's add some momentum so it rolls after it falls, the rigid body is already added by Create3DPrimitive
    //body.ApplyImpulse(new(0, 0, 0.1f), new());
    body.ApplyAngularImpulse(new(0, 10, 0));

    impulseApplied = true;
}